Lombok是一个可以通过简单的注解形式来帮助我们简化消除一些必须有但显得很臃肿的Java代码的工具,通过使用对应的注解,可以在编译源码的时候生成对应的方法。
官方地址:
https://projectlombok.org/github地址:
https://github.com/rzwitserloot/lombok
在IntelliJ IDEA 中的使用
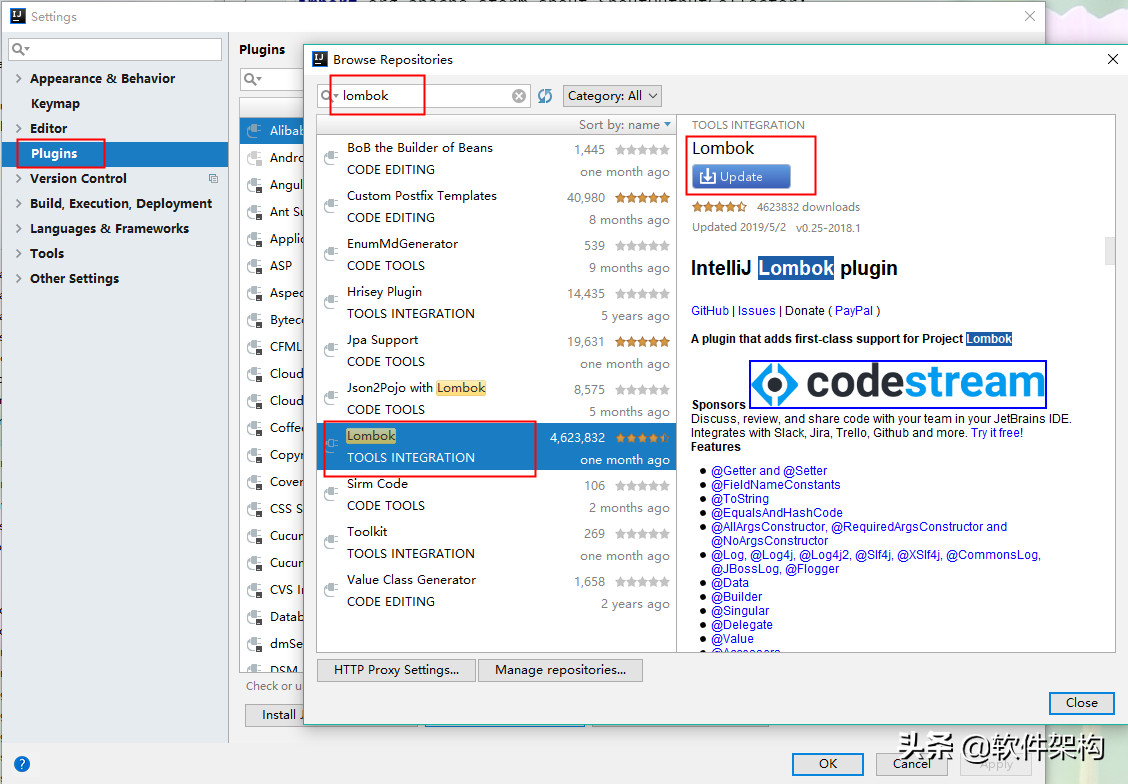
(1)先安装lombok插件,步骤如下(新版的IDEA已经自带集成了Lombok插件,可以不用安装)。
- 菜单 File > Settings > Plugins;
- 点击 Browse repositories... 按钮;
- 搜索 Lombok 插件;
- 点击 Install plugin或者Update(更新);
- 重启 IntelliJ IDEA;
(2)然后在项目中引入lombok的jar包
引入lombok 1.18.8 最新版jar包。
<dependency>
    <groupId>org.projectlombok</groupId>
    <artifactId>lombok</artifactId>
    <version>1.18.8</version>
    <scope>provided</scope>
</dependency>
Lombok的scope=provided,说明它只在编译阶段生效,不需要打入包中。事实正是如此,Lombok在编译期将带Lombok注解的Java文件正确编译为完整的Class文件。
Lombok用法
Lombok注解说明:
val:用在局部变量前面,相当于将变量声明为final。
public static void main(String[] args) {
    System.out.println( "Hello World!" );
    val sets = new HashSet<String>();
    val lists = new ArrayList<String>();
    val maps = new HashMap<String, String>();
    //=>相当于如下
    final Set<String> sets2 = new HashSet<>();
    final List<String> lists2 = new ArrayList<>();
    final Map<String, String> maps2 = new HashMap<>();
}
@NonNull:给方法参数增加这个注解会自动在方法内对该参数进行是否为空的校验,如果为空,则抛出NPE(NullPointerException)。
public void notNullExample(@NonNull String string) {
    string.length();
}

//=>相当于
public void notNullExample2(String string) {
    if (string != null) {
    string.length();
    } else {
    throw new NullPointerException("null");
    }
}
@Cleanup:自动管理资源,用在局部变量之前,在当前变量范围内即将执行完毕退出之前会自动清理资源,自动生成try-finally这样的代码来关闭流。
public static void main(String[] args) throws Exception {
    try {
        @Cleanup InputStream inputStream = new FileInputStream(args[0]);
    } catch (FileNotFoundException e) {
        e.printStackTrace();
    }

//=>相当于

    InputStream inputStream = null;
    try {
        inputStream = new FileInputStream(args[0]);
    } catch (FileNotFoundException e) {
        e.printStackTrace();
    } finally {
        if (inputStream != null) {
            try {
                inputStream.close();
            } catch (IOException e) {
                e.printStackTrace();
            }

        }

    }

}
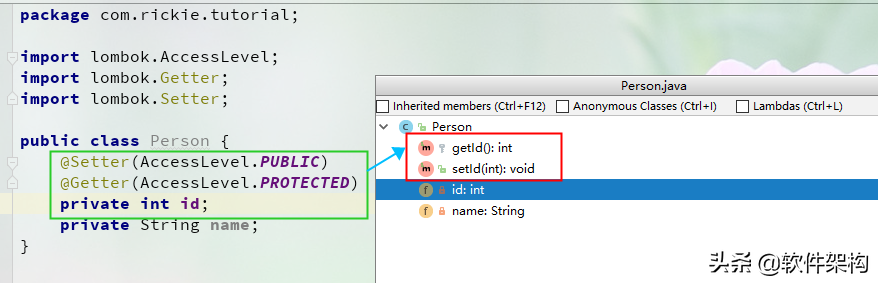
@Getter/@Setter:用在属性上,再也不用自己手写setter和getter方法了,还可以指定访问范围。
public class Person {
    @Setter(AccessLevel.PUBLIC)
    @Getter(AccessLevel.PROTECTED)
    private int id;
    private String name;
}
在IntelliJ中按下Ctrl+F12快捷键,就可以看到Lombok 自动生成了一系列的方法。
@ToString:用在类上,可以自动覆写toString方法,当然还可以加其他参数,例如@ToString(exclude=”id”)排除id属性,或者@ToString(callSuper=true, includeFieldNames=true)调用父类的toString方法,包含所有属性。
@ToString(exclude = "id", callSuper = true, includeFieldNames = true)
public class LombokDemo {
    private int id;
    private String name;
    private int age;
    public static void main(String[] args) {
//输出LombokDemo(super=
        com.terrynow.tutorial.LombokDemo@1540e19d, name=null, age=0)
        System.out.println(new LombokDemo());

    }

}
@EqualsAndHashCode:用在类上,自动生成equals方法和hashCode方法。
@EqualsAndHashCode(exclude = {"name"}, callSuper = false)
public class Person {
    @Setter(AccessLevel.PUBLIC)
    @Getter(AccessLevel.PROTECTED)
    private int id;
    private String name;
}
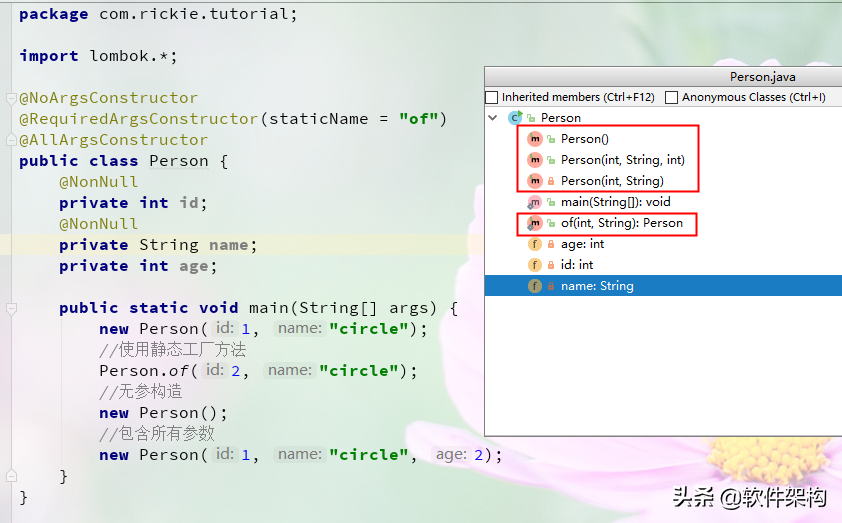
@NoArgsConstructor, @RequiredArgsConstructor and @AllArgsConstructor:用在类上,自动生成无参构造和使用所有参数的构造函数以及把所有@NonNull属性作为参数的构造函数,如果指定staticName = “of”参数,同时还会生成一个返回类对象的静态工厂方法,比使用构造函数方便很多。
import lombok.*;

@NoArgsConstructor
@RequiredArgsConstructor(staticName = "of")
@AllArgsConstructor
public class Person {

    @NonNull
    private int id;

    @NonNull
    private String name;

    private int age;

    public static void main(String[] args) {

        new Person(1, "circle");

        //使用静态工厂方法
        Person.of(2, "circle");

        //无参构造
        new Person();

        //包含所有参数
        new Person(1, "circle", 2);

    }
}
@Data:注解在类上,相当于同时使用了@ToString、@EqualsAndHashCode、@Getter、@Setter和@RequiredArgsConstrutor这些注解,对于POJO类十分有用。
import lombok.*;

@Data
public class Person {

    private int id;
    private String name;
    private int age;

    public static void main(String[] args) {
        //无参构造
        Person rickie = new Person();

        rickie.id = 1;
        rickie.name = "rickie";
        rickie.age = 26;

        // output: Person(id=1, name=rickie, age=26)
        System.out.println(rickie.toString());
    }
}
@Value:用在类上,是@Data的不可变形式,相当于为属性添加final声明,只提供getter方法,而不提供setter方法。
import lombok.*;

@Value
public class Person {
    private int id;
    private String name;
    private int age;
    public static void main(String[] args) {
        //有参构造
        Person rickie = new Person(1, "rickie", 26);
        // output: Person(id=1, name=rickie, age=26)
        System.out.println(rickie.toString());
    }
}
@Builder:用在类、构造器、方法上,为你提供复杂的builder APIs。
让你可以像如下方式一样调用Person person = Person.builder().id(1).name("rickie").age(26).build();更多说明参考Builder。
@Builder
public class Person {
    private int id;
    private String name;
    private int age;

    public static void main(String[] args) {
        Person person = Person.builder().id(1).name("rickie").age(26).build();
        // output: Person(id=1, name=rickie, age=26)
        System.out.println(person.toString());
    }

}
@SneakyThrows:自动抛受检异常,而无需显式在方法上使用throws语句。
@SneakyThrows()
public void read() {
    InputStream inputStream = new FileInputStream("");
}
@Synchronized:用在方法上,将方法声明为同步的,并自动加锁,而锁对象是一个私有的属性$lock或$LOCK,而java中的synchronized关键字锁对象是this,锁在this或者自己的类对象上存在副作用,就是你不能阻止非受控代码去锁this或者类对象,这可能会导致竞争条件或者其它线程错误。
public class SynchronizedDemo {
@Synchronized
public static void hello() {
    System.out.println("world");
}

//相当于
private static final Object $LOCK = new Object[0];
    public static void hello() {
        synchronized ($LOCK) {
            System.out.println("world");
        }
    }
}
@Getter(lazy=true):可以替代经典的Double Check Lock样板代码。
public class GetterLazyExample {
    @Getter(lazy = true)
    private final double[] cached = expensive();
    private double[] expensive() {
        double[] result = new double[1000000];
        for (int i = 0; i < result.length; i++) {
            result[i] = Math.asin(i);
        }
        return result;
    }
}
上面的代码,等价于下面的代码,只是比较冗长一些。
import java.util.concurrent.atomic.AtomicReference;

public class GetterLazyExample {
    private final AtomicReference<Object> cached = new AtomicReference<>();
    public double[] getCached() {
        java.lang.Object value = this.cached.get();
        if (value == null) {
            synchronized (this.cached) {
                value = this.cached.get();
                if (value == null) {
                    final double[] actualValue = expensive();
                    value = actualValue == null ? this.cached : actualValue;
                    this.cached.set(value);
                }
            }
        }
        return (double[]) (value == this.cached ? null : value);
    }

    private double[] expensive() {
        double[] result = new double[1000000];
        for (int i = 0; i < result.length; i++) {
            result[i] = Math.asin(i);
        }

        return result;

    }

}
@Log:根据不同的注解生成不同类型的log对象,但是实例名称都是log,有六种可选实现类。
- @CommonsLog Creates log = org.apache.commons.logging.LogFactory.getLog(LogExample.class);
- @Log Creates log = java.util.logging.Logger.getLogger(LogExample.class.getName());
- @Log4j Creates log = org.apache.log4j.Logger.getLogger(LogExample.class);
- @Log4j2 Creates log = org.apache.logging.log4j.LogManager.getLogger(LogExample.class);
- @Slf4j Creates log = org.slf4j.LoggerFactory.getLogger(LogExample.class);
- @XSlf4j Creates log = org.slf4j.ext.XLoggerFactory.getXLogger(LogExample.class);
注意:在使用log对象时,还需要在pom中添加相应的依赖项,很多教程里都只说添加lombok依赖就行了,其实不然。还需要slf4j以及它的实现(logback),这里选择了logback,其他的实现也是可以的。
必须添加log相应的依赖jar包。
<dependency>
    <groupId>org.slf4j</groupId>
    <artifactId>slf4j-api</artifactId>
    <version>1.7.25</version>
</dependency>

<dependency>
    <groupId>ch.qos.logback</groupId>
    <artifactId>logback-classic</artifactId>
    <version>1.2.3</version>
</dependency>
如下图所示。

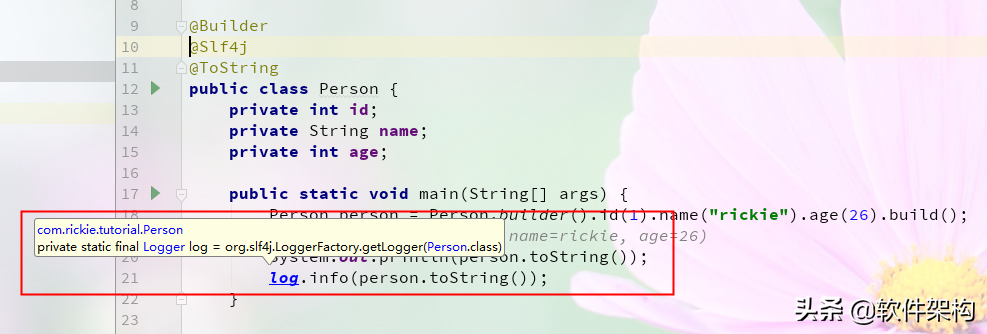
使用lombok的@Slf4j注解。
@Builder
@Slf4j
@ToString
public class Person {
    private int id;
    private String name;
    private int age;

    public static void main(String[] args) {
        Person person = Person.builder().id(1).name("rickie").age(26).build();
        // output: Person(id=1, name=rickie, age=26)
        System.out.println(person.toString());
        log.info(person.toString());
    }

}
可以查看log对象对应的实际Java代码。
private static final Logger log = org.slf4j.LoggerFactory.getLogger(Person.class);
Lombok背后的自定义注解原理
前面介绍了Lombok这款Java效率工具各种定义注解的使用方法,但作为一个Java开发者来说光了解插件或者技术框架的用法只是做到了“知其然而不知其所以然”,如果真正掌握其背后的技术原理,看明白源码设计理念才能真正做到“知其然知其所以然”。
Lombok实现了JSR 269 API规范,javac在Java6开始支持这一规范,只要程序实现了该API,就能在javac运行的时候得到调用,那么Lombok在编译时使用的就是javac,具体流程如下:

首先是项目的源代码文件,在经过编译处理以后,lombok会使用自己的抽象语法树去进行注解的匹配,如果在项目中的某一个类中使用了lombok中的注解,那么注解编译器就会自动去匹配项目中的注解对应到在lombok语法树中的注解文件,并经过自动编译匹配来生成对应类中的getter或者setter方法,达到简化代码的目的。执行顺序就如上图的叠放顺序。
更详细的信息,可以参考官方文档:https://projectlombok.org/features/index.html

文章评论